
 As part of any management and audit solution for networking, Syslog is vital.
Syslog messages allow us to track system error messages, exceptions, and other information, such as device configuration changes.
It allows for historical reporting, depending on the application keeping the logs, as well as help in fault finding.
Cisco devices support 8 levels of logging information from Facility level 0 through 7
| Emergency | 0 |
| Alert | 1 |
| Critical | 2 |
| Error | 3 |
| Warning | 4 |
| Notification | 5 |
| Informational | 6 |
| Debug | 7 |
To enable Syslog 2 things are required
- Configuration on the device to send Syslog messages
- An application that will receive the messages and store them in a database.
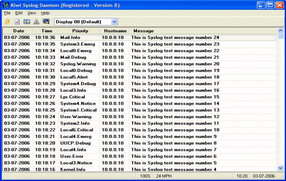
In the below live demo, you will see my putty screen with my telnet session into my router, and behind it you will see my Syslog application. There are many of these products on the market, each with its own pro’s and con’s, so use whatever you prefer. In my Live demo I am using an application called ‘Syslog Watcher Personal Edition’, it’s a very easy to use application and is freeware. You will notice after I configured logging on the router, the log messages appear in my application.
The command breakdown for the live demo is as follows
AOIP.ORG# conf t
Enter global configuration mode
AOIP.ORG(config)# logging 192.168.1.1
This instructs the router to send Syslog messages to my application, hosted on a machine with the IP 192.168.1.1
AOIP.ORG(config)# logging trap info
I have chosen to have level 6 messages sent to my application.
Additionally I could have used the ‘service timestamps log datetime localtime’ command to force the time on the logs.
If you still do not see any log messages after using the above commands, make sure that logging has not been disabled on the device. To force logging on a Cisco device use the ‘logging on’ command.


